How to Make a Chart in Powerpoint 2007 TUTORIAL
(Archives) Microsoft PowerPoint 2007: Charting Information
Last updated
This article is based on legacy software.
When presenting numerical information, charts are oft more effective and efficient than text or lists of numbers. PowerPoint makes information technology easy to add and customize charts for use in your presentation.
Creating Charts
PowerPoint allows you to create and display charts of numeric information. You tin enter information into an internal worksheet, and PowerPoint volition generate a chart to announced on your slide.
-
In the Normal view, from the Slides pane, select the slide to which you lot want to add a chart
-
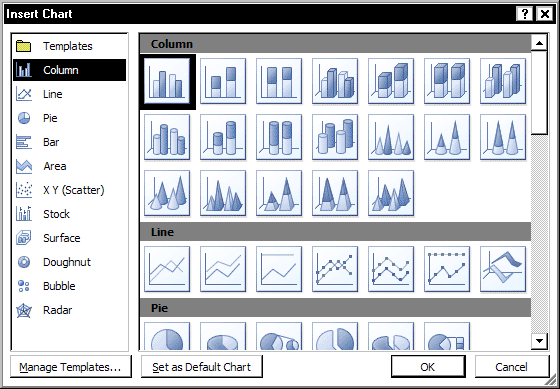
From the Insert tab, in the Illustrations group, click Chart

The Insert Chart dialog box appears.
-
From the category list, select a category of chart
-
From the gallery, select a nautical chart type
-
Click OK
The Insert Chart dialog box closes and Microsoft Excel opens in a split up window, displaying a table with information and labels to be entered into the chart.
Annotation: For more information about entering information in Excel, refer to Getting Started with Excel: Entering Text and Getting Started with Excel: Entering Numbers. -
Type your information into the Excel worksheet
The chart in PowerPoint updates automatically as you enter data. -
When finished, to close Excel, click the
 in the upper right corner
The chart is available in the selected slide.
Updating Chart Information
Once you have created a chart, yous may desire to update it past adding or deleting data. You can do this past switching to the worksheet you lot used to create the chart, changing values, and inbound new information or deleting existing data. The chart is automatically updated, including the fable if you change the data labels.
Changing Chart Values
-
Select the chart
The Design, Layout, and Format control tabs appear. -
From the Pattern tab, in the Data group, click EDIT DATA

Microsoft Excel opens in a split window, displaying a table with information and labels to be entered into the chart.
NOTE: For more information about entering information in Excel, refer to Getting Started with Excel: Entering Text and Getting Started with Excel: Entering Numbers. -
In the worksheet, select the cell you want to change and blazon the new value
-
Printing [Enter]
The chart is updated on the slide. -
When finished, to close Excel, click the
in the upper right corner
Adding Data
-
Select the chart
The Design, Layout, and Format command tabs appear. -
From the Blueprint tab, in the Data group, click EDIT DATA
Microsoft Excel opens in a split up window, displaying a table with data and labels to be entered into the chart.
Annotation: For more data about entering data in Excel, refer to Getting Started with Excel: Entering Text and Getting Started with Excel: Inbound Numbers. -
In the advisable location, type the new data
HINT: If you type data in a new row or column next to the table, information technology will automatically exist included in the chart. -
Press [Enter]
The chart is updated on the slide. -
When finished, to close Excel, click the
in the upper right corner
Deleting Data
-
Select the chart
The Blueprint, Layout, and Format command tabs appear. -
From the Design tab, in the Information grouping, click EDIT Data
Microsoft Excel opens in a split up window, displaying a table with data and labels to be entered into the chart.
NOTE: For more data about entering information in Excel, refer to Getting Started with Excel: Entering Text and Getting Started with Excel: Entering Numbers. -
In the worksheet, select the values you wish to delete
HINT: If you want to delete an unabridged column or row, click on the advisable column or row identifier. -
Printing [Delete]
The chart is updated on the slide. -
When finished, to close Excel, click the
in the upper correct corner
Customizing Chart Appearance
PowerPoint automatically assigns specific colors and layouts to the charts that you create. Nonetheless, you tin customize the advent of your nautical chart at any time. PowerPoint allows you to change the colors of chart elements, add or remove chart elements (e.grand., gridlines, information labels, or error bars), or change the appearance of the entire chart.
To Apply Pre-Formatted Appearances to a Chart
If you are unhappy with the advent of your nautical chart, but do not want to individually change each element, PowerPoint provides you with preformatted styles (e.g., colour schemes) and layouts (e.m., presence or absence of gridlines or information labels). This allows yous to choose from a gallery of completely formatted nautical chart appearances that may exist more suitable for your project.
-
Select the nautical chart you would like to format
The Pattern, Layout, and Format control tabs appear. -
To alter the layout of your chart, from the Design tab, in the Chart Layouts group, select the desired layout
The new layout is applied to your chart.
HINT: For more than options of chart layouts, click More than .
. -
To change the manner of your nautical chart, from the Design tab, in the Chart Styles group, select the desired style
The new style is applied to your chart.
HINT: For more options of chart styles, click MORE.
Calculation and Removing Chart Elements
PowerPoint allows you to display many dissimilar elements (east.g., titles, gridlines, or specific data points) on your chart. Y'all can add or remove elements from your chart at any time.
-
Select the chart you would like to format
The Pattern, Layout, and Format control tabs appear. -
From the Layout tab, select the desired nautical chart chemical element » select the desired formatting
Button
Name
Part

Chart Title Hides the title or allows you to set its position 
Axis Titles Rotates, moves, or hides the titles for the vertical and horizontal axes 
Legend Displays the legend in various positions effectually or on elevation of the chart, or hides the legend 
Data Labels Hides or displays value labels for each signal, and allows yous to select the position for the labels 
Chart Information Tabular array Hides or displays a table summarizing the data displayed in your chart 
Axes Hides the axes or their labels, switches the axes, or changes the measurements displayed with each axis 
Chart Gridlines Shows or hides major and minor gridlines 
Plot Surface area Changes or removes the color behind the information on a two-dimensional chart 
Chart Wall Changes or removes the colour on the vertical "walls" behind the data on a three-dimensional nautical chart 
Nautical chart Floor Changes or removes the color on the horizontal "floor" nether the data on a 3-dimensional chart 
3-D Rotation Opens the Format Nautical chart Area dialog box, which allows y'all to change the angle from which a three-dimensional chart is viewed 
Trendline Shows a line that indicates the average course of the information 
Lines Hides or displays lines at data points which compare the information to other points or the axes, and clarify where each data point falls 
Up/Down Confined Hides or displays bars between the lowest and highest numbers at a given point on the graph 
Error Confined Hides or displays confined that signal how much the information may vary from the displayed values, and allows yous to set the corporeality of mistake
Changing Chart Types
Yous tin can change the chart type of your chart even once y'all accept already applied formatting.
-
Right click the nautical chart you would like to alter » select Change Chart Blazon...
The Change Chart Type dialog box appears. -
Select the desired new chart type
-
Click OK
DOWNLOAD HERE
How to Make a Chart in Powerpoint 2007 TUTORIAL
Posted by: bessiesamen1946.blogspot.com

Comments
Post a Comment